Configure Your Policy
Your policy is the set of rules your agent must satisfy before any order is signed. You set it across four tabs in the admin UI: Markets, Risk, Treasury, and Algos.
The Markets tab
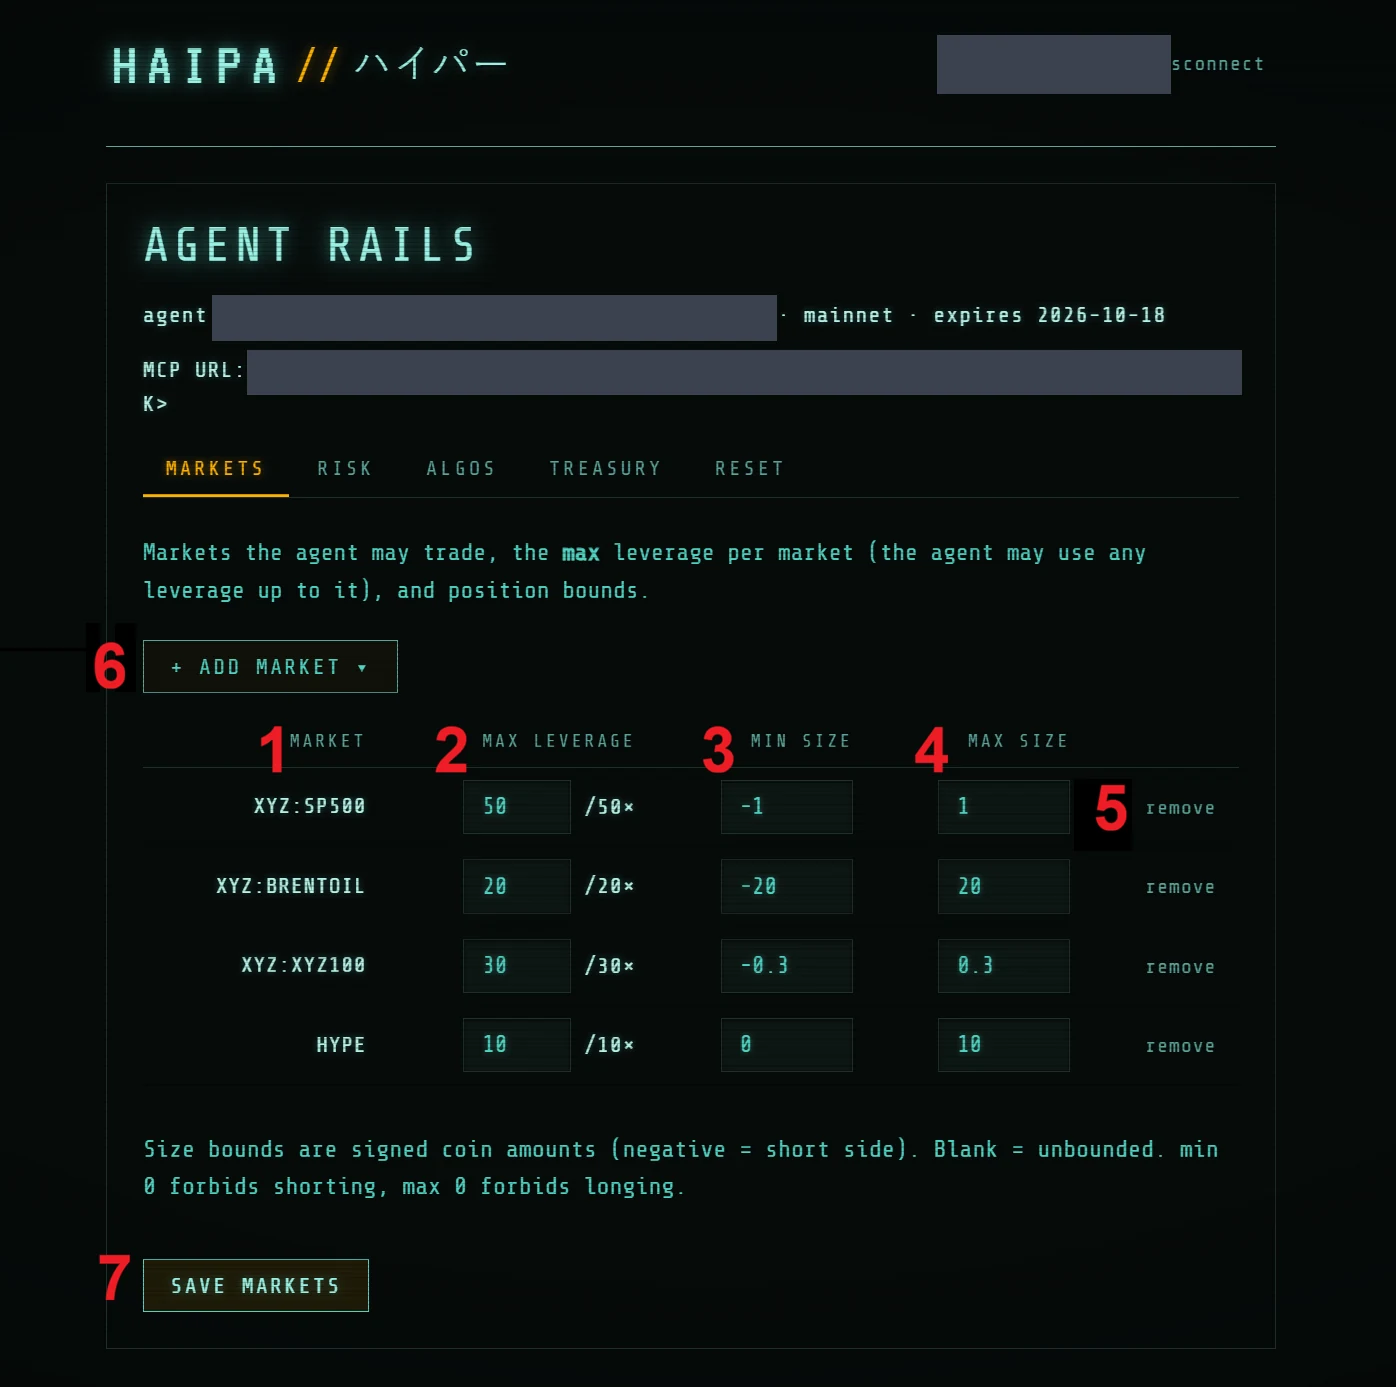
The Markets tab is where you tell your agent which perp instruments it can trade. You can also set max leverage per market and set maximum and minimum position guidance. The numbers below match the callouts in the screenshot:
- Market — the canonical Hyperliquid symbol for that product, e.g.
xyz:SP500. - Max Leverage — set the max leverage to a custom value lower than the market's native maximum to manage risk. For example, limit
xyz:SP500to 20x instead of the 50x the on-chain perp market supports natively. - Min Size* — the minimum net position you want to accumulate. For example, if you don't want to short more than 20 perp contracts, set Min Size to
-20. - Max Size* — the maximum net position you want to accumulate. For example, if you don't want to go long more than 100 perp contracts, set Max Size to
100. - Remove — for your agent to trade a perp market, it must be in this list. Removing a market bans your agent from placing new orders in that instrument, even if you still hold an open net position.
- Add Market — search for markets by symbol.
- Save Markets — you must press this to persist your changes.
Size bounds are signed coin amounts (negative = short side). Leaving a bound blank means unbounded; a min of 0 forbids shorting and a max of 0 forbids longing.
* Enforced best-effort pre-trade. Under certain on-chain race conditions, your agent may briefly exceed these bounds. We therefore recommend also setting Max Leverage, which produces an effective max and min position that is enforced on-chain (post-trade) in addition to HAIPA's pre-trade checks.
The Risk tab
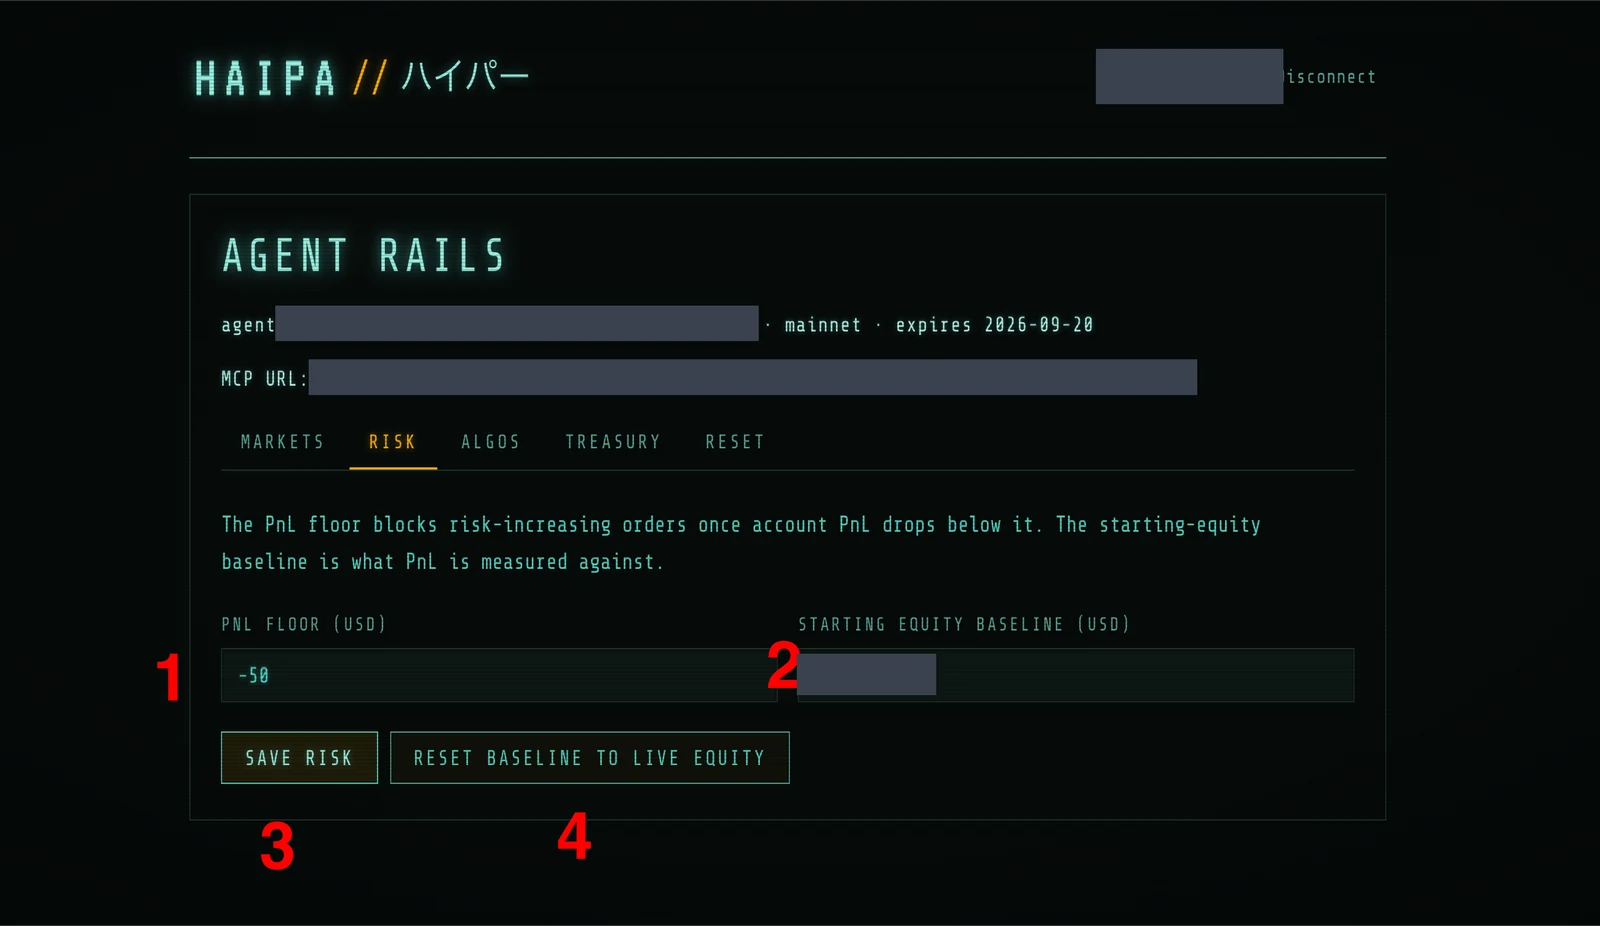
The Risk tab is where you tell your agent how to calculate your account's PnL. You can set a cut-off PnL: below that level, your agent is denied from placing any further orders until you manually intervene — either by taking over trading or by re-adjusting your risk limits. The numbers below match the callouts in the screenshot:
- PnL Floor (USD)* — the minimum PnL you're willing to accept before your agent is cut off from trading. This is the level at which you want to intervene and stop a runaway agent.
- Starting Equity Baseline (USD) — the amount of USDC you started with. HAIPA needs this to calculate current PnL as
Current Equity − Starting Equity. - Save Risk — press this to persist your risk settings.
- Reset Baseline to Live Equity — resets your Starting Equity to your current equity, effectively resetting your PnL to zero.
* Enforced best-effort pre-trade. Your account can still lose more than this; the PnL floor is a mechanism for locking out your agent during a losing streak so you can manually intervene.
The Algos tab
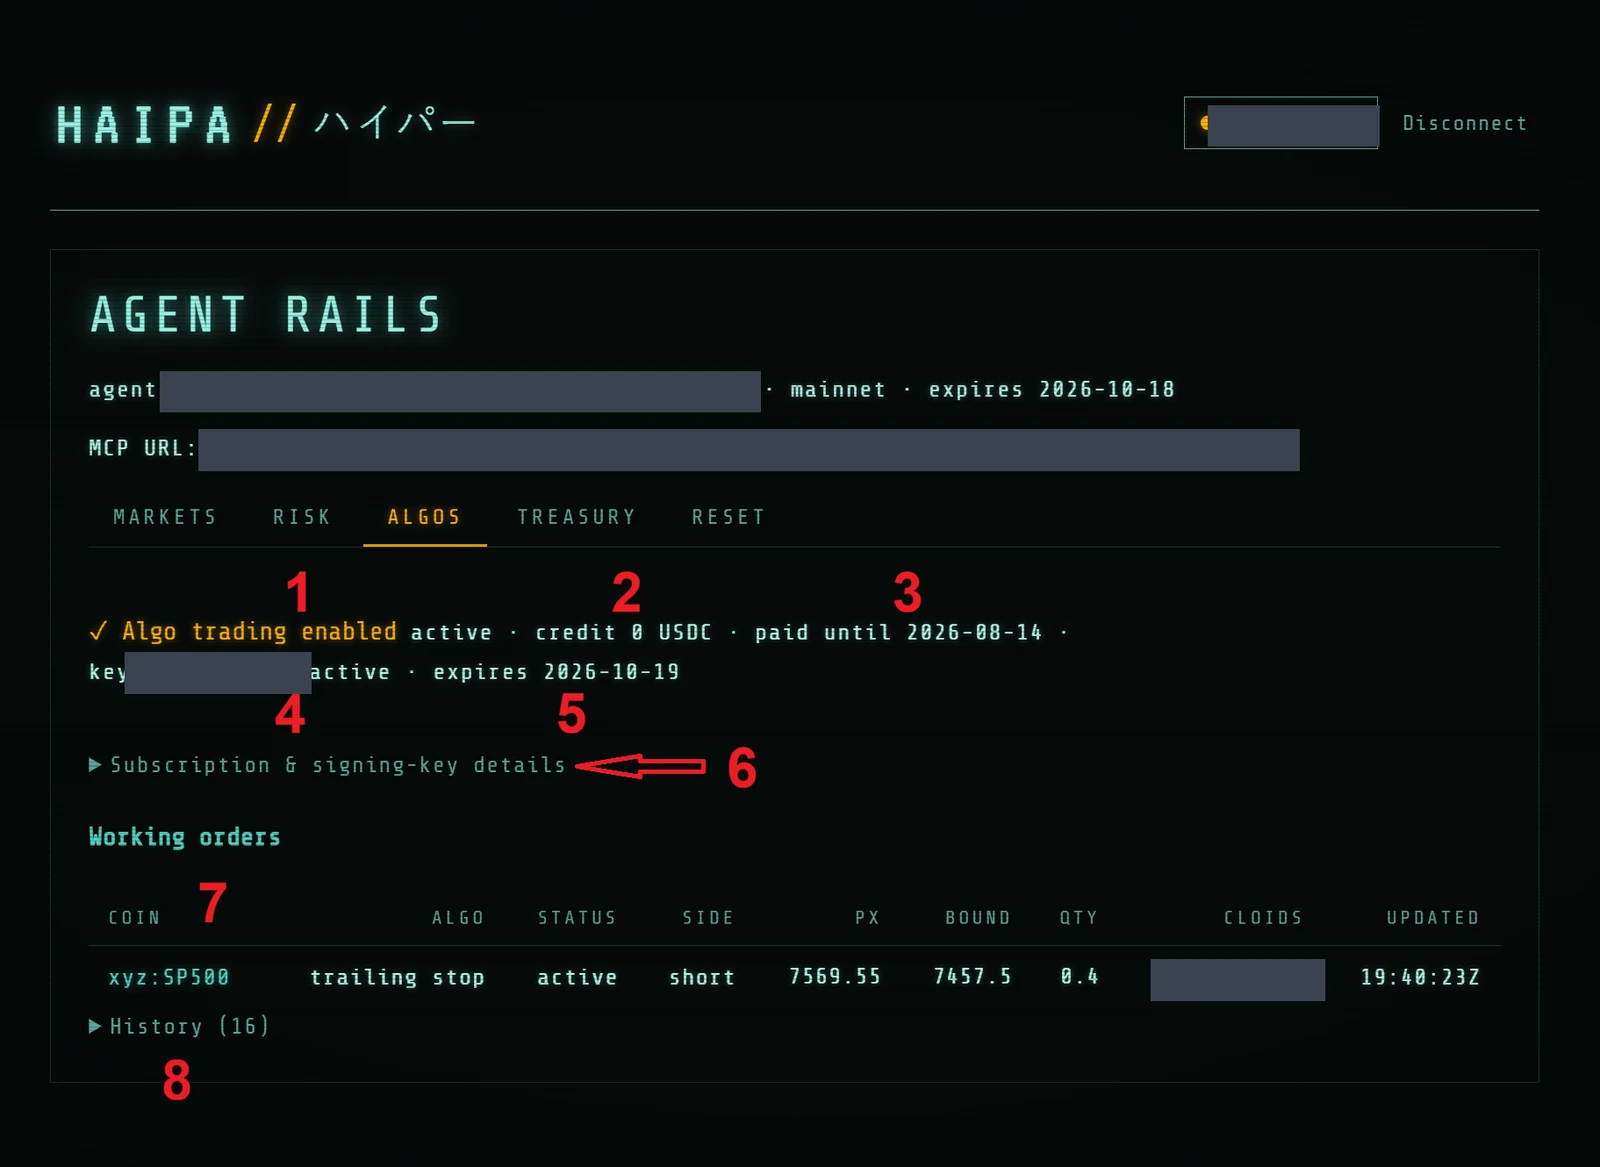
The Algos tab is where you enable, monitor, and manage your agent's autonomous algo orders. The numbers below match the callouts in the screenshot:
- Status — whether algo trading is currently enabled.
- Credit — prepaid credits not yet debited.
- Subscription — when the next subscription payment is due.
- Key — your Algo Agent Key.
- Key Expiration — when your Algo Agent Key expires and needs rotation (see When and how often should you rotate your agent key?).
- Subscription & Signing Key Details — expandable details for your algo subscription and signing key. Server-side algo execution runs on a dedicated signing key with a prepaid subscription (30 USDC / 30 days).
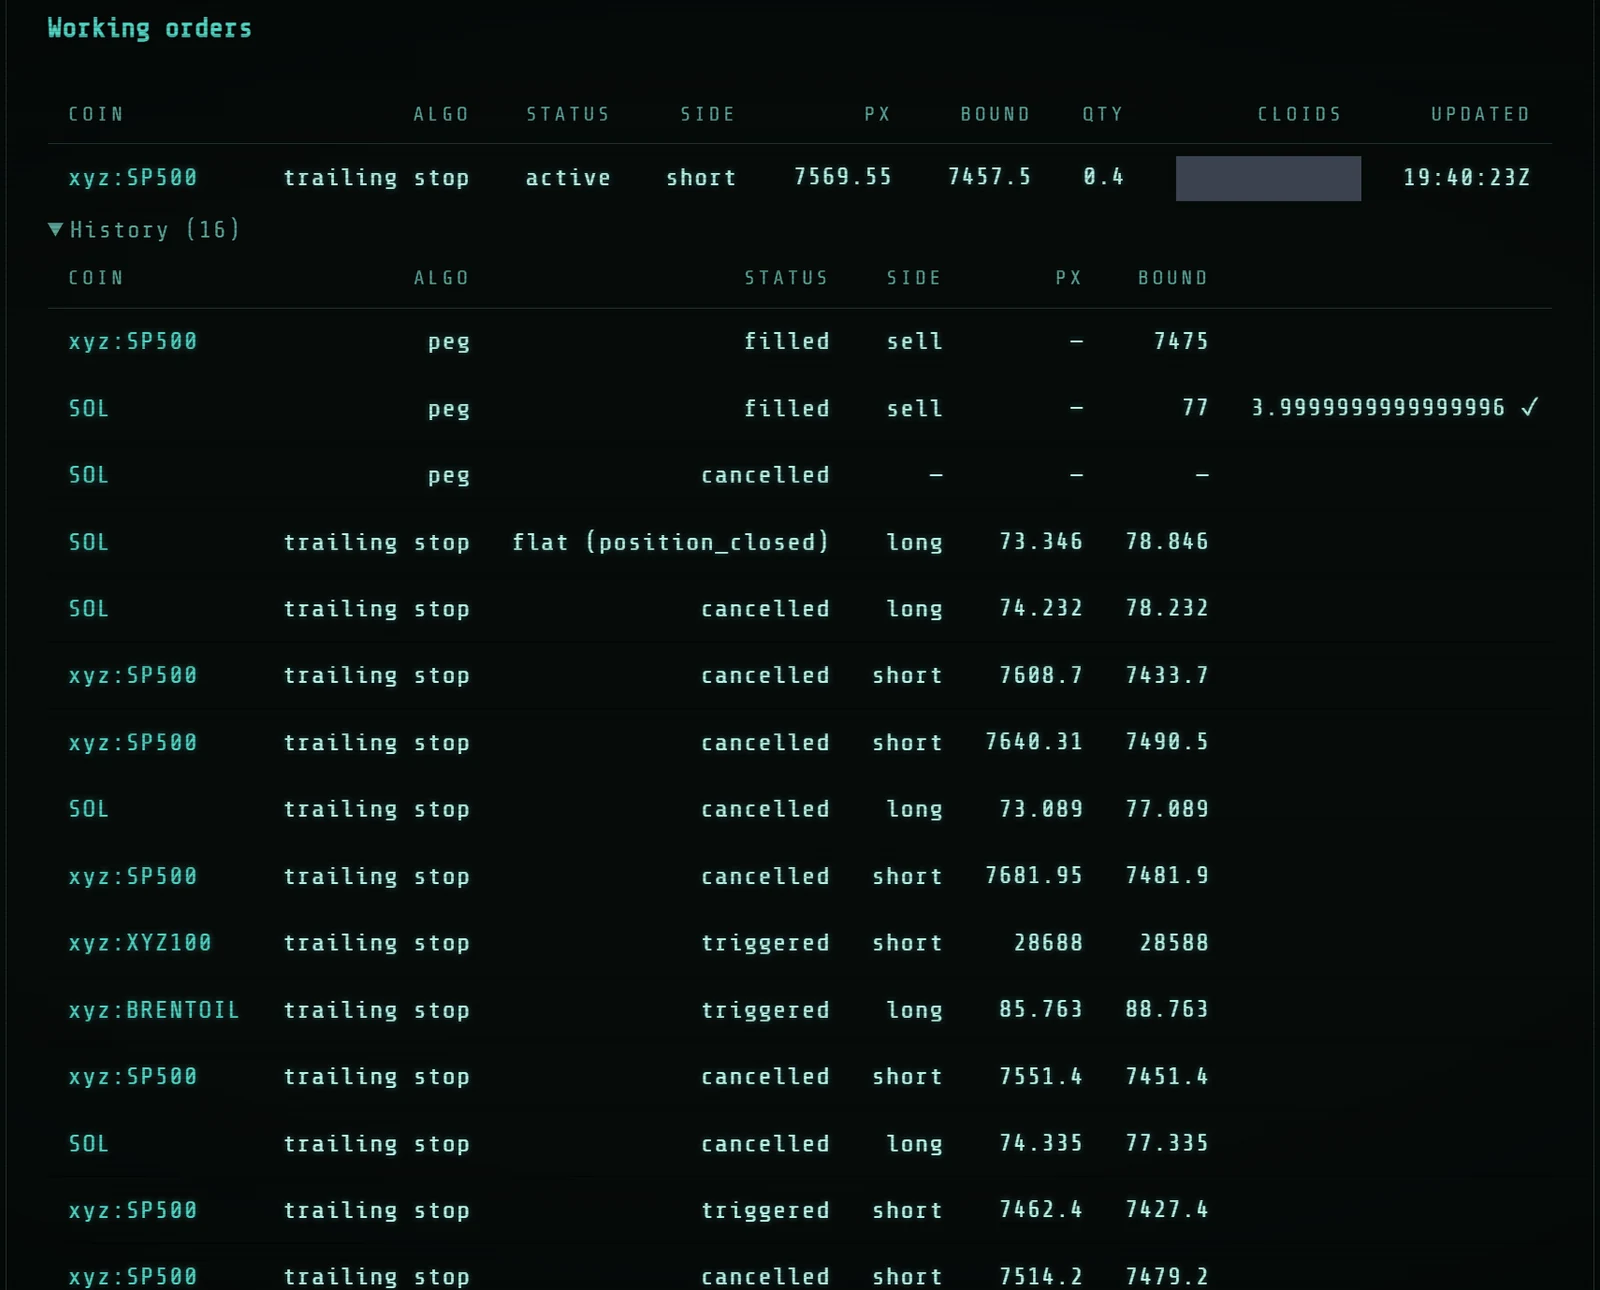
- Working orders — all your currently working algo orders and their basic information.
- History — your previous algo orders that have filled or been canceled.
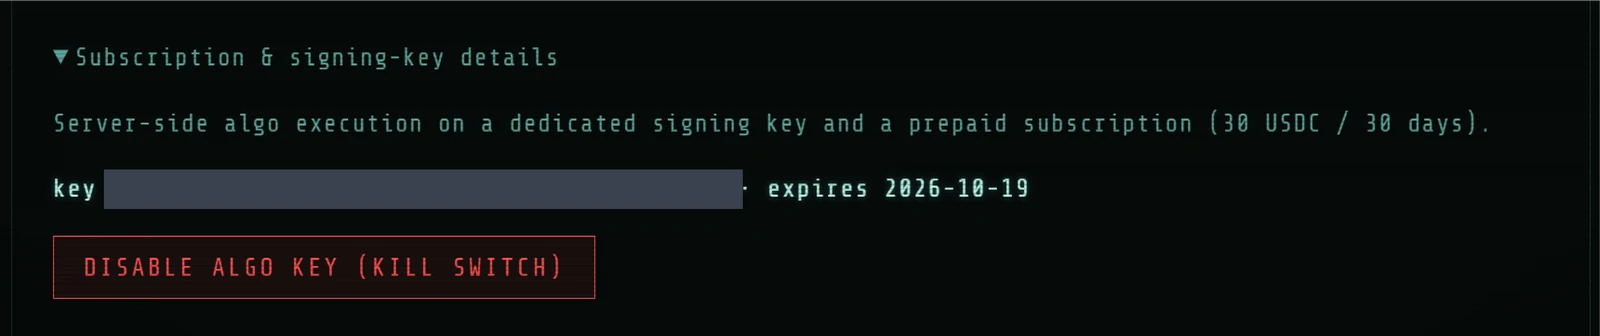
Expanding Subscription & signing-key details reveals the Disable Algo Key (kill switch):
Disabling the Algo Agent Key here disables all running algos. This is the nuclear option. If you only want to rotate the key, use the key rotation steps instead.
Your working and historical algo orders appear in the Working orders and History tables:
The Treasury tab
The Treasury tab is where you see what your account is worth and where you deposit and withdraw. The numbers below match the callouts in the screenshot:
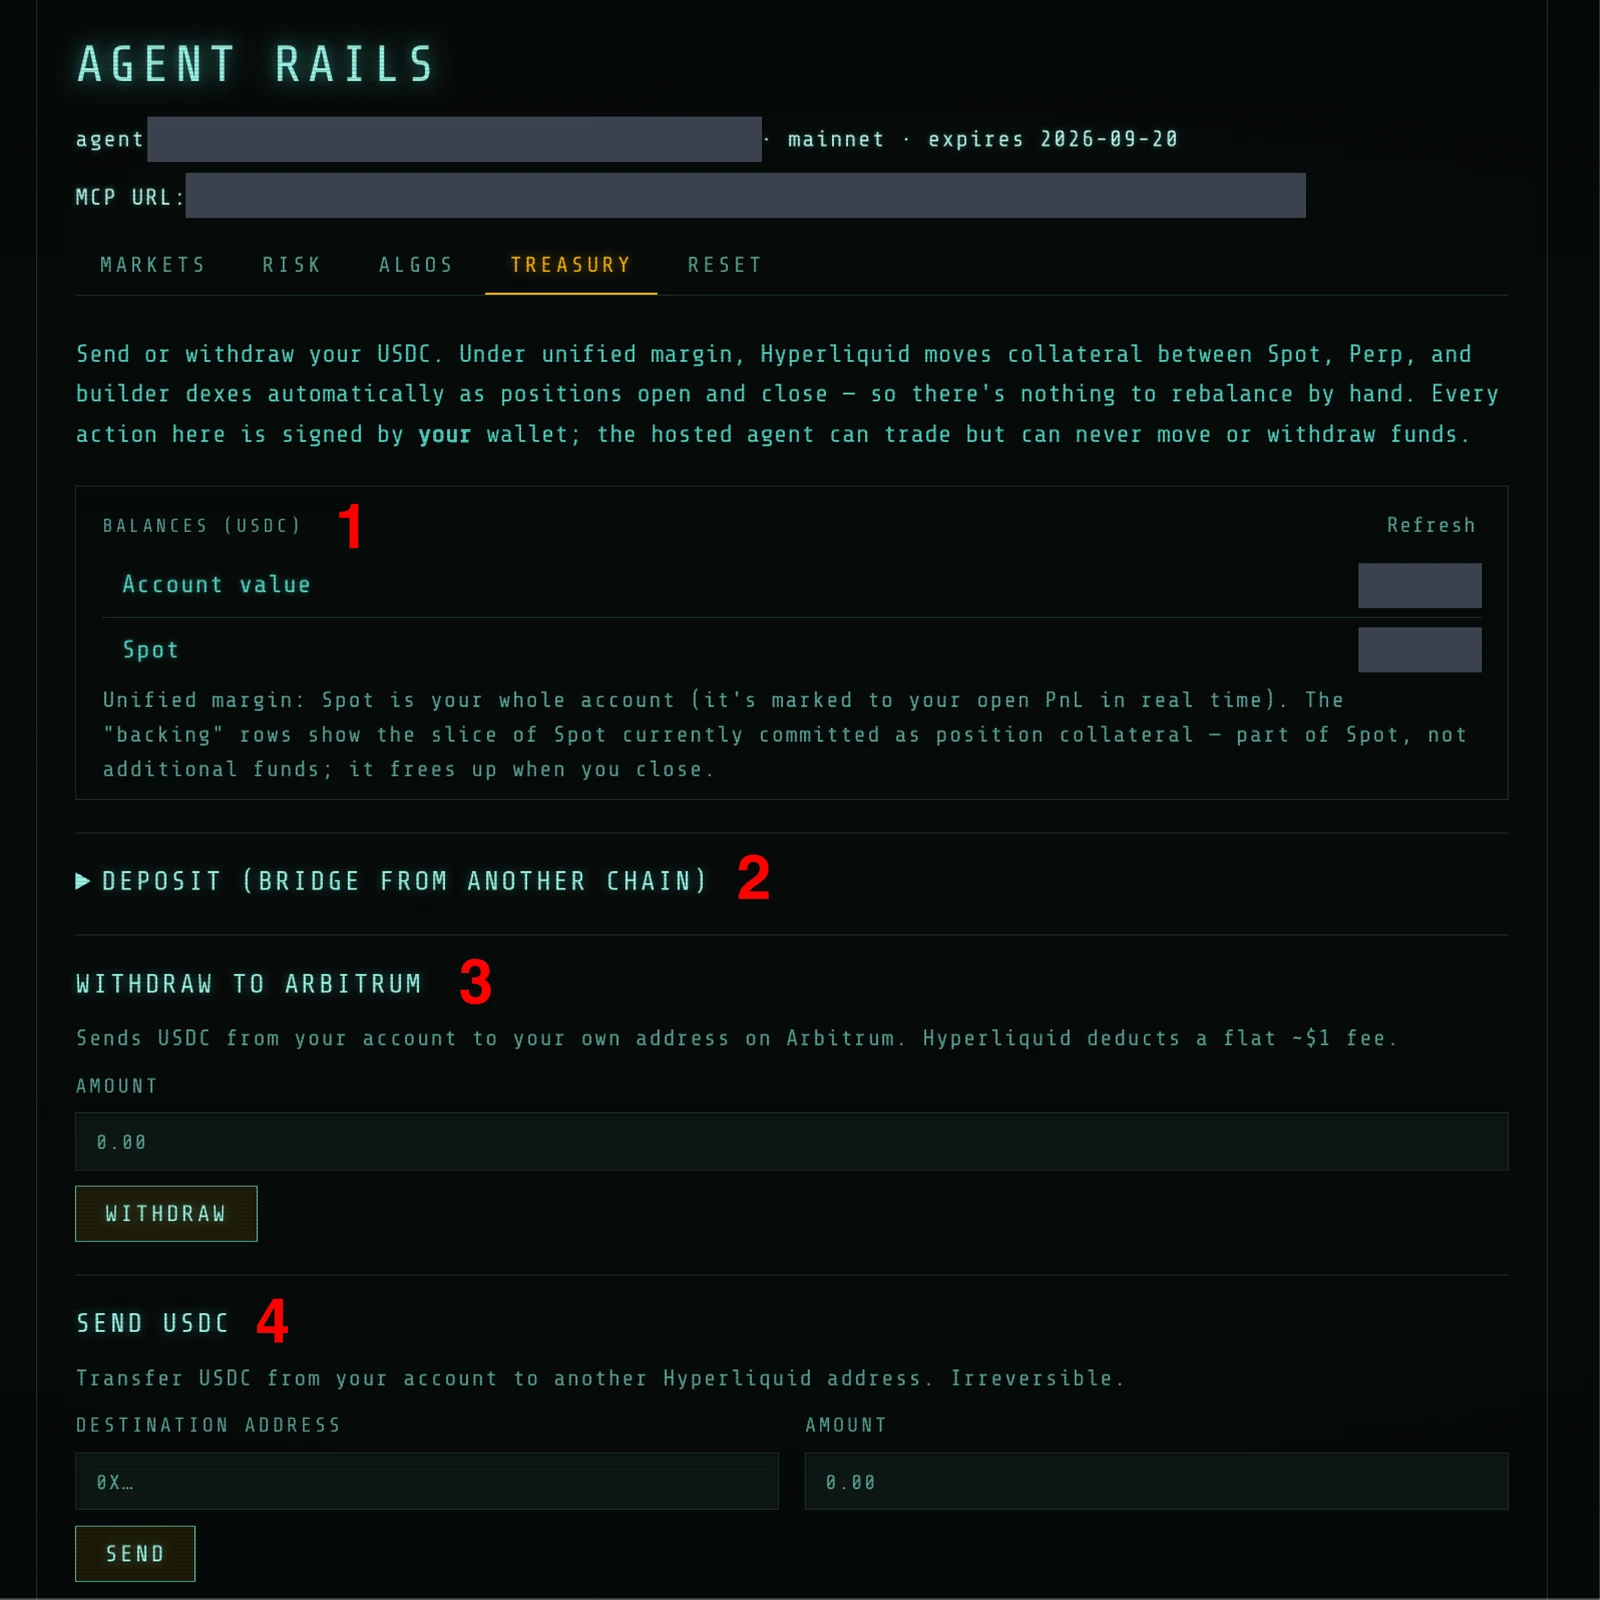
- Balances — shows total account value and the breakdown of value and required collateral across spot and the DEXs (e.g.
xyz). - Deposit from another chain — using the Across Bridge.
- Withdraw to Arbitrum — the native withdraw method on Hyperliquid. It costs 1 USDC per withdrawal (this is Hyperliquid's native base fee, not charged by HAIPA).
- Native USDC send — send USDC to an external account.